A campaign is a product you sell or earn a commission on. In other words a campaign is a service or product your refer your users to.
Cost2profit tracks monetization of a specific product or service, which you feature on your website. Cost2profit is ready to go wordpress solution if you want to track affiliate monetization or your leads via Contatform7 (CF7) WordPress plugin. Cost2Profit can be also used on non-WordPress Website however it needs a custom implementation by our team.
Let’s start your first campaign.
In order to track a monetization you need to set up a campaign in Cost2Profit panel.
In case of affiliate networks, a campaign defines an affiliate link on which readers click to buy an external product or service. This affiliate link is where you earn commissions (either via a click, acquisition or lead). A Cost2Profit campaign allows you to track the conversion of your readers on the affiliate links.
If your business needs to interact with customers via a contact form, Cost2Profit can be of support. If readers need to send you a message via an online form, a Cost2Profit campaign can track the message submission via Contact Form 7, along with where your readers are coming from.
How to set up a campaign in Cost2Profit?
You can set up your campaign in a couple of easy steps.
Step 1: Click on add a campaign.

Step 2: Select or enter your website.
Step 3: Select or enter a group which the offered product/service from this campaign should roll up to. While not required, this field is recommended. It will allow you to better understand performance of products and services from similar or the same categories.
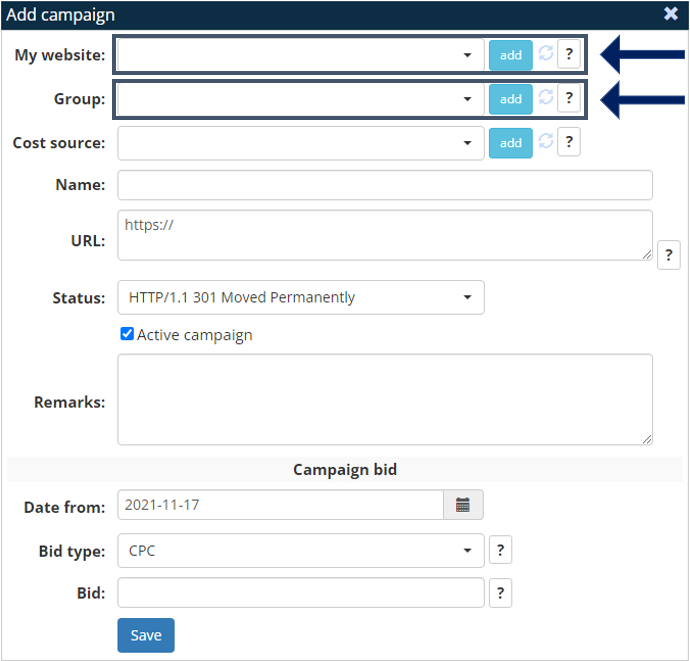
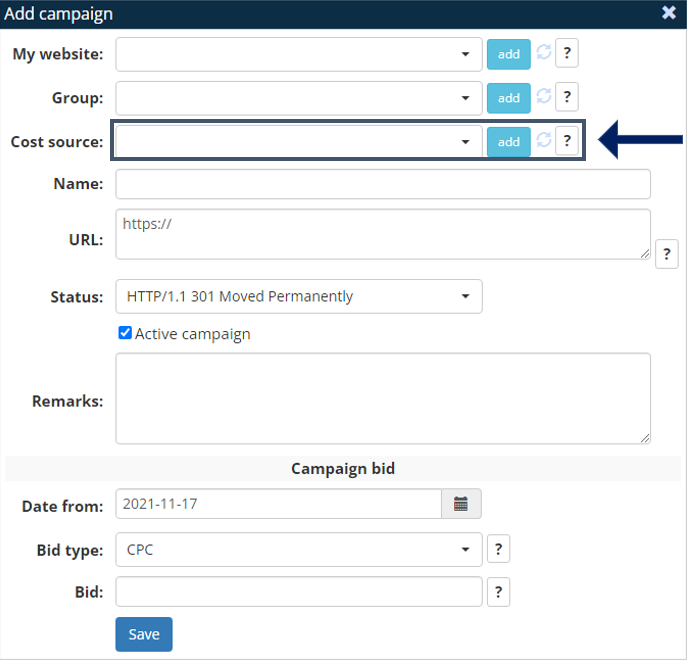
Step 4: We recommend to leave a cost source field empty if you set up a first campaign. This option is for advanced users only.
Cost2Profit can assign the cost of source traffic to the campaign. For instance, if you run a specific ad campaign on Facebook, Google or another external source to acquire traffic solely for your specific campaign, than the cost will be allocated only to that campaign. Of course in more complicated scenarios you can allocate cost of source traffic to for example only 3 chosen campaigns. The cost of traffic acquisition will be distributed to those campaigns accordingly. If you leave cost source field empty Cost2Profit will attribute costs of traffic on default whenever it is possible. You can read more about the cost source here.
Step 5: The field “name” is a place for the name of your campaign.
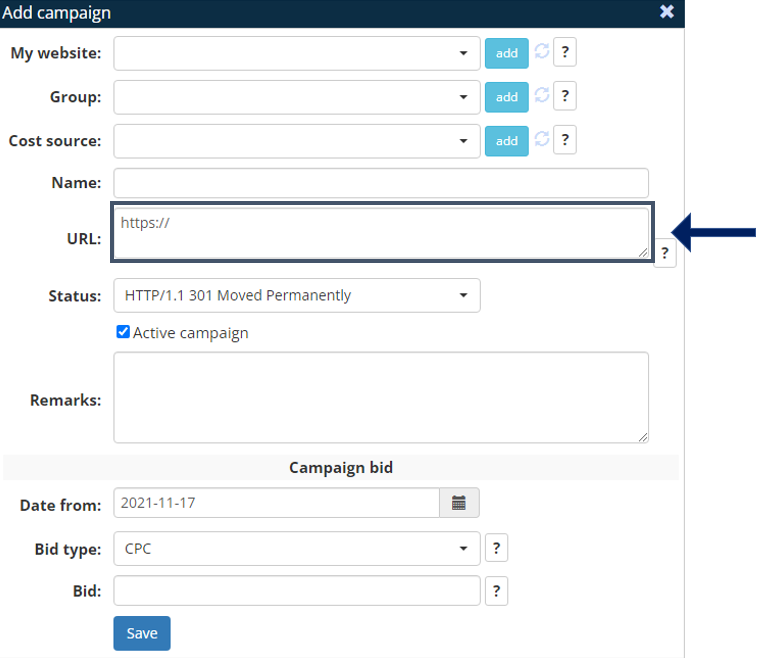
Step 6: URL is a place for an affiliate link from your affiliate network. Important: each affiliate link must include an empty parameter at the very end of the link. Check with your affiliate program for options. Some of the most popular parameters include the following: &epi= &uap= &ref1=. The link should look like the following, e.g. “https://affiliate-network.com?a=fcqsmy&i=o1m3qb&epi=”.
In order for C2P to process information, you need to set up a postback in your affiliate program. If you are adding your campaign for the first time, make sure to set up a postback in your affiliate network. The postback will allow you to monitor leads and conversions real time.
Step 7: The status should always be set to HTTP/1.1 301 Moved Permanently. For more advanced users, please talk to us.
Step 8: The field “remarks” serves as a place for any comments or annotations.
Step 9: Campaign bid defines the type and amount of monetization:
- CPA: if you earn per each conversion (acquisition), you want to select “CPA” along with the value the affiliate network pays you for each conversion/acquisition on the specific product/service.
- CPC: if you earn per each click, you want to select “CPC” along with the value the affiliate network pays you for each click on the specific product/service.
- CPS%: if you earn a % commission of each sale, you want to select “CPS%” along with the value the affiliate network pays you for each sal on the specific product/service. You should use CPS% only if your affiliate partner submits the value of each transaction in the parameter “val=”. Make sure that this parameter is present in the affiliate link.
Final result
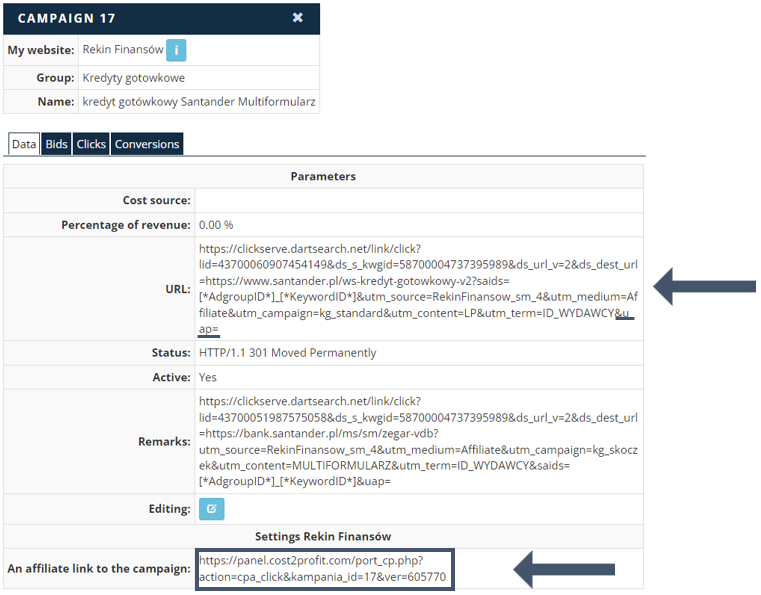
At this point, you should come to an end, and your final result should look similar to the outcome below.
Just a reminder:
- The URL field is for the URL provided by your affiliate network. Remember to append one of the empty parameters such as &uap=, &epi= or &ref1= so that you can start tracking performance in Cost2Profit.
A final step (necessary)
- The “Affiliate link to the campaign” is what links tracking in Cost2Profit and your affiliate network. This is the link you should use on your website for the offer. Just paste this link to one of the integrated plugins (Affiliate Links or Pretty Links) and than place the link from the plugin on your website.
That’s it! Cost2Profit now tracks monetization of your campaign!
What’s next?
Read the next step: How to add a “campaign group” in Cost2Profit?
